So I know I mentioned that Part 2 of this post would display the final vision for the garage (which is now the faux basement and workshop) but that’ll have to wait for part 3. Since April we’ve been busy framing, drywalling, wiring and, oh yeah, having a son.

Anywho, when last we left I was in the process of organizing the clutter in the garage so I could clear some space to build the wall. I abandoned that initiative after sorting out the entryway side of the garage and decided to begin work on the partition.
After buying a bunch of materials from Home Depot and renting a truck to get it all home, I was ready to begin. I feel like it’s important to state at this time that none of this entire project was completed by me alone. It never would’ve been finished without the help of friends and family and am really grateful to all who contributed their time.
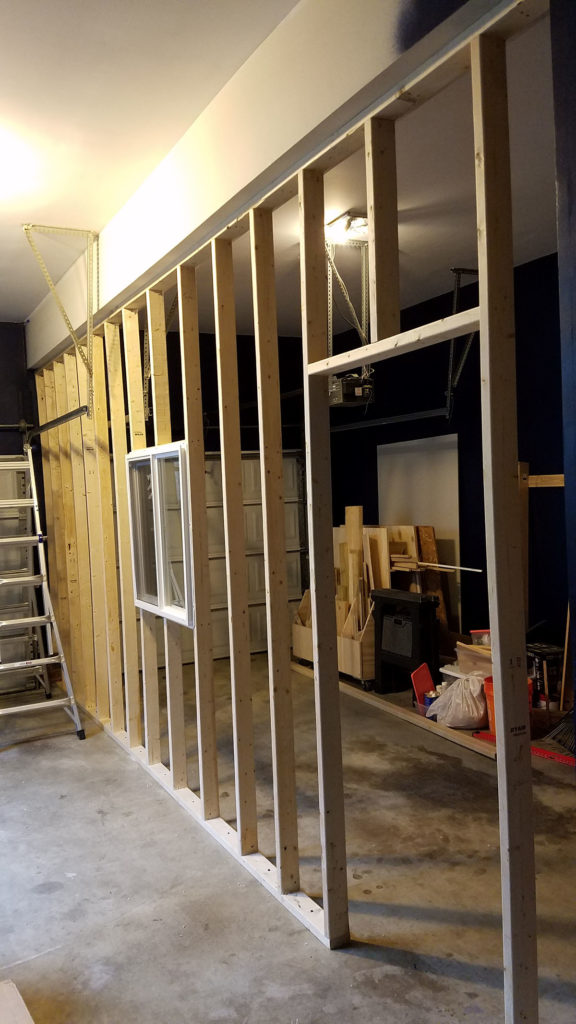
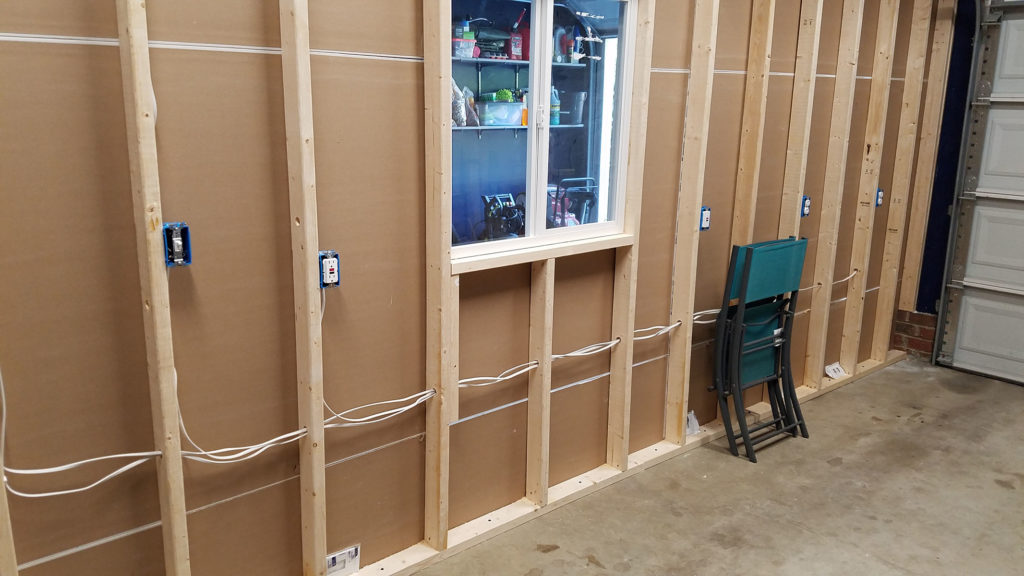
First things first – I had to anchor a bottom plate to the concrete floor to begin the framing. After several trips to the the store, renting a hammer drill, buying the wrong screws, and liquefying a carbide bit I finally manage to lay a good foundation for the rest of the work to come. I enlisted the help of my brother Peter to help get the basic framing complete and window installed and this satisfying part of the project was complete in a day.
I have to say the project in its entirety (especially as it was all new to me) was pretty daunting, but every completed step reinvigorated my drive and strengthened my resolve.
The next step was to attach drywall to the entryway side of the garage. This would never have been finished with my sanity intact without Jessi’s help. Part of the challenge that became quickly apparent was the the header bowed in the middle about 1″ and the floor sloped away from the house about 2″ overall (good for moisture, bad for square drywall measurement. In the end we got it done.
Now we officially had separation and a good idea of what the final feel would be. As an added bonus, you could no longer see the cluttered mess in the shop unless you deliberately went in there (and opened the garage door because there weren’t any lights…. YET)
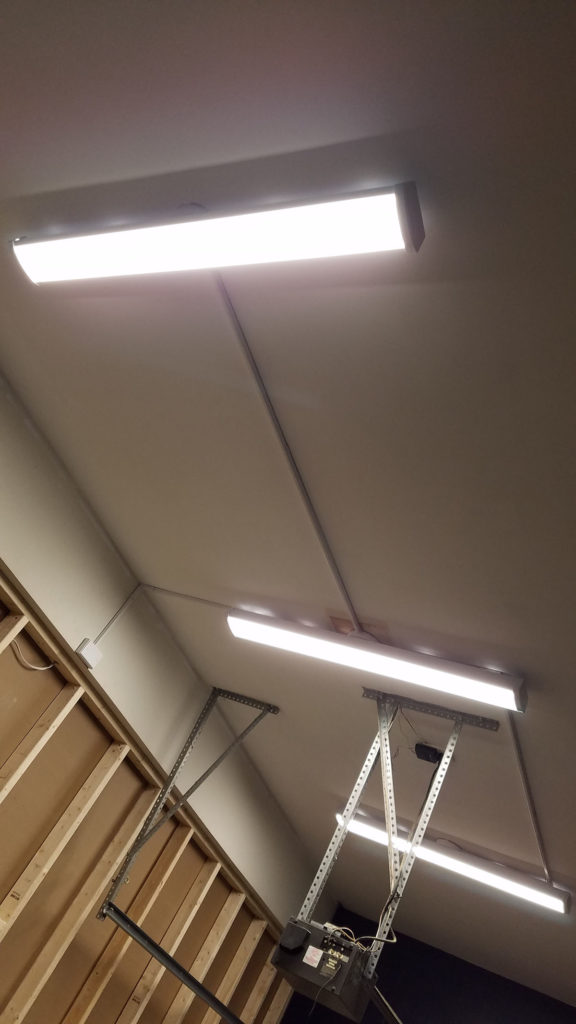
All credit for the next phase of construction goes to my father in law Bruce – master electrician (we only melted a little bit of the Romex wiring). It was decided – by me – that we needed two important improvements to the new shop straight away. We needed more power (two new circuits – three total) to handle running whatever equipment I wanted without tripping breakers, and ample lighting to be able to work in the garage comfortably even with doors closed. After more trips to the store for surface mount raceway parts than I’d like to admit (or can remember) we finally had 3 new 4′ LED lights on the ceiling and 4 new outlets on the newly constructed wall.
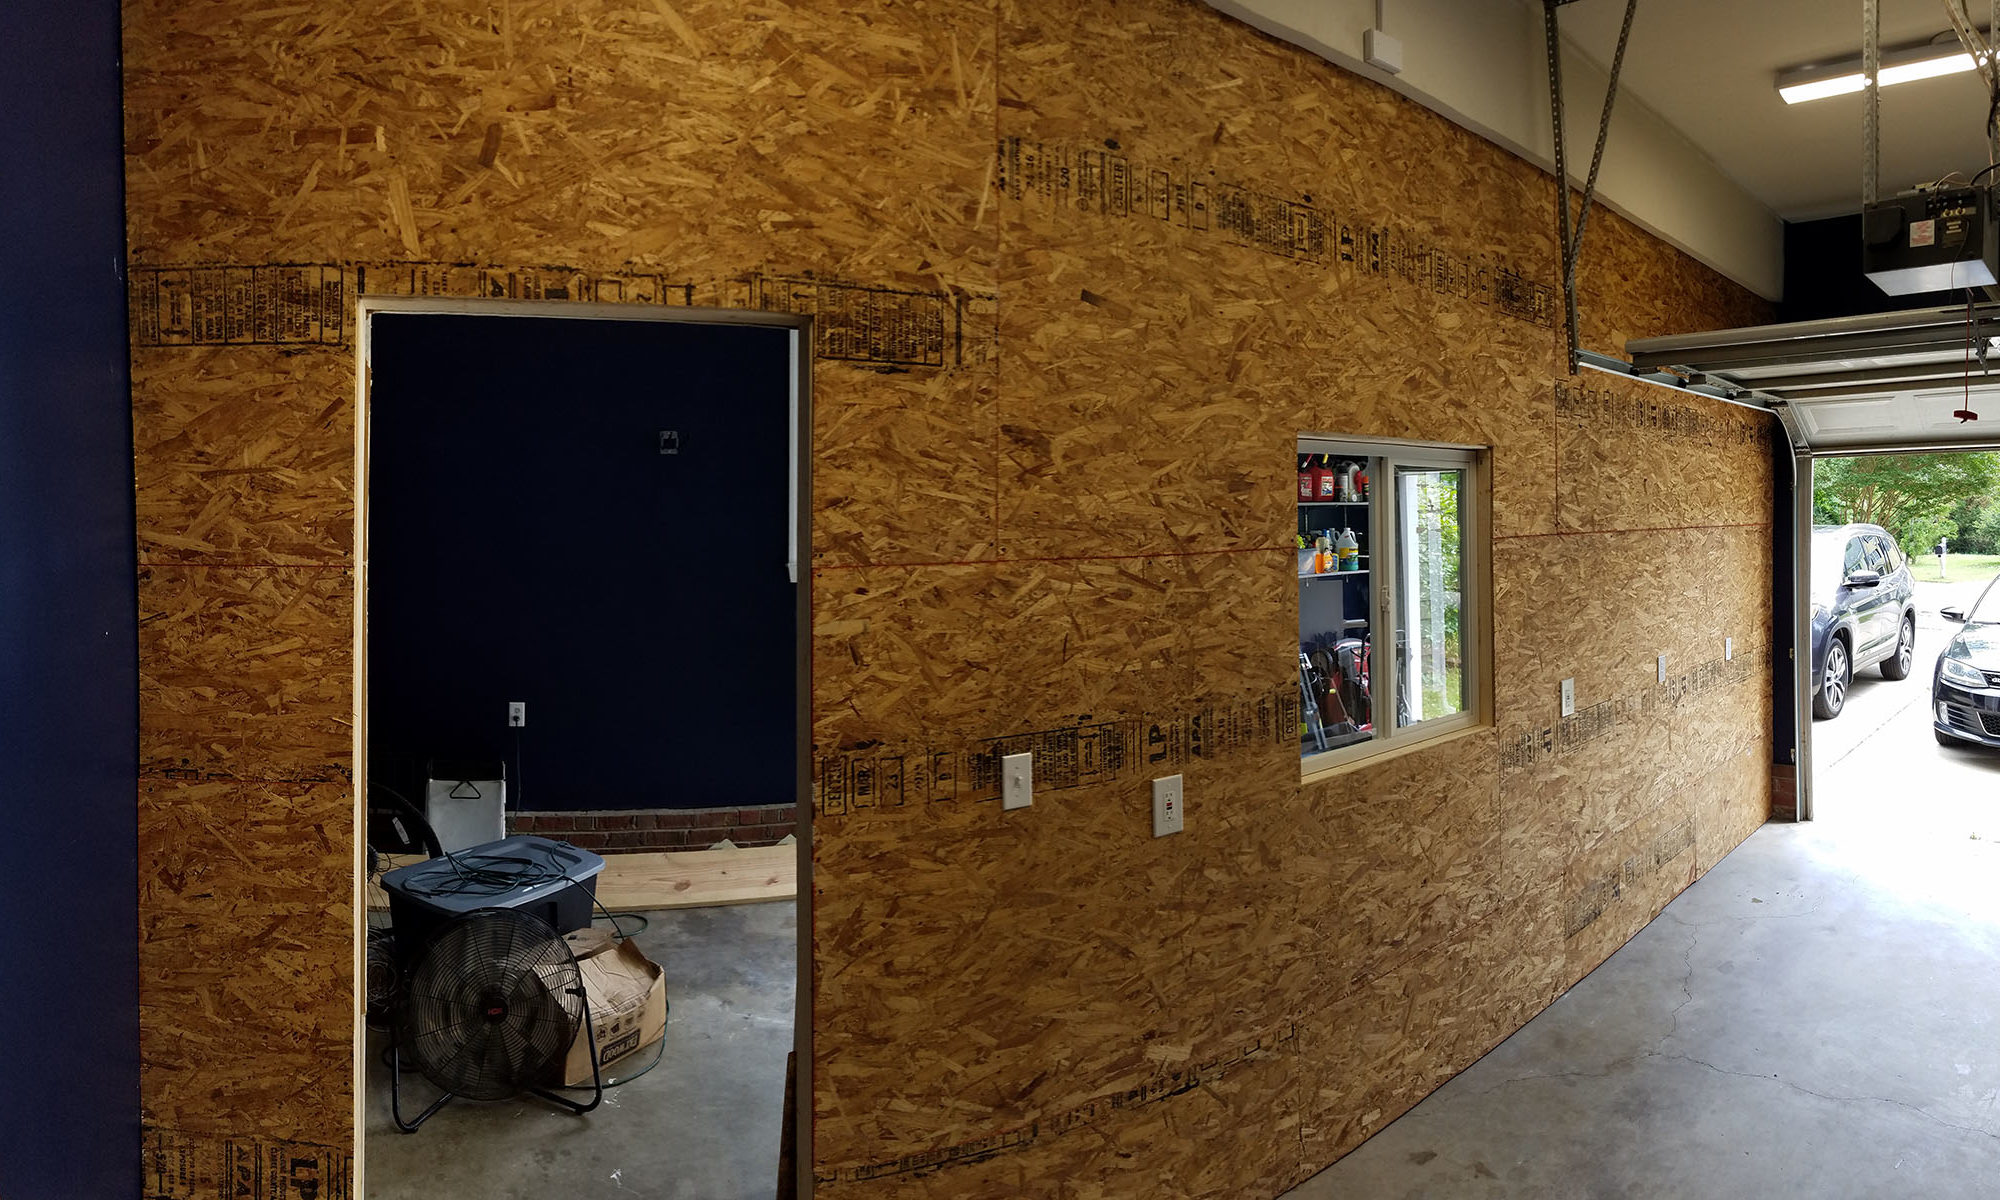
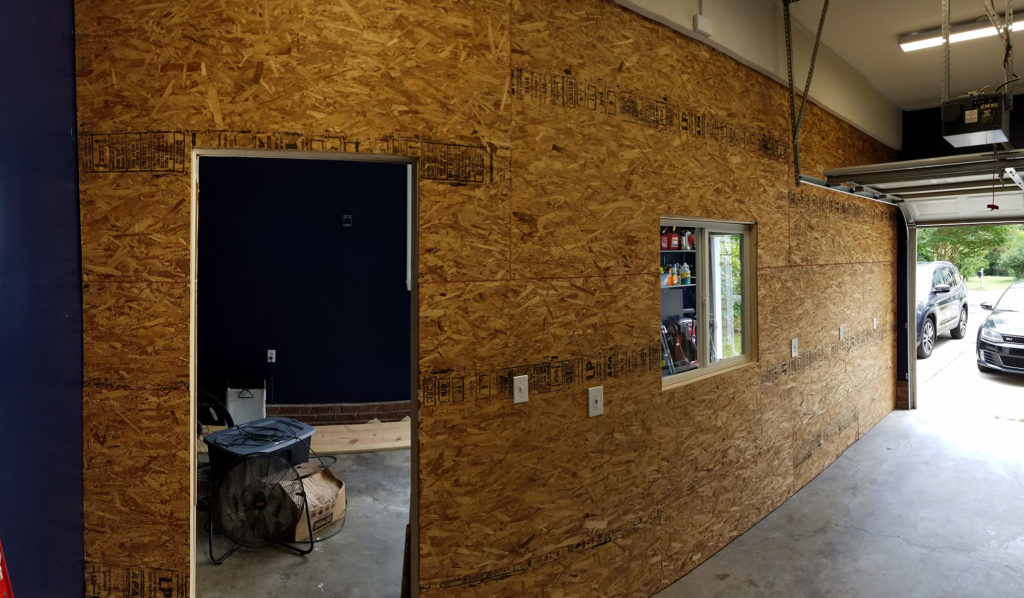
After finishing up the electrical work, the last thing to do was close up the wall on the shop side. I chose OSB (chipboard) for the flexibility of mounting options it would afford and general durability. Having received a guide attachment for the circular saw no more than 1 week prior for my birthday, I was ready to complete the last major part of the wall.
As I mentioned before, there isn’t a single stage of this work that I take sole credit for and the OSB mounting was no exception. My buddy Ryan generously contributed his time one Wednesday after work to help out. It took us until close to midnight but we got it done it turned out looking great.
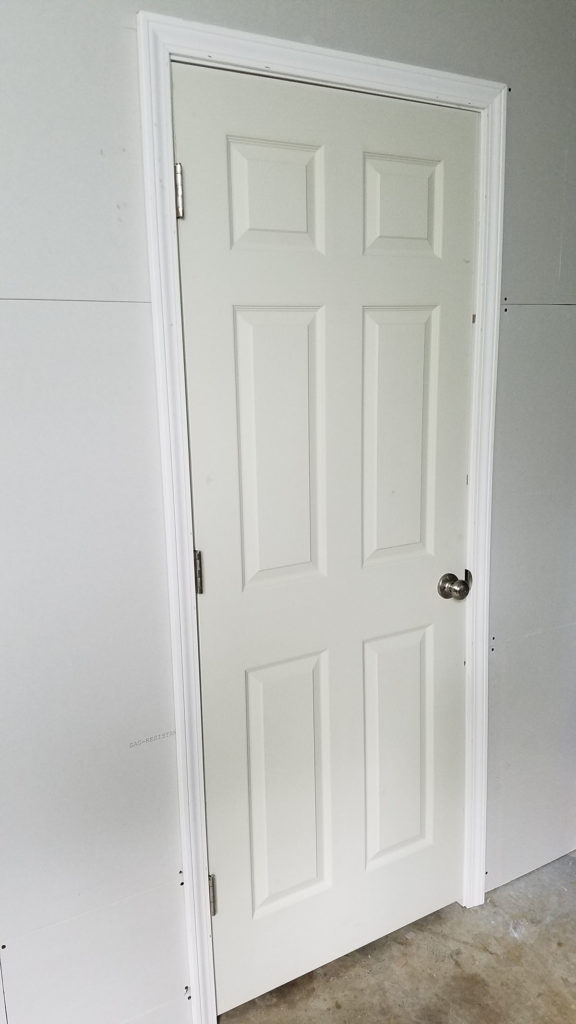
Now that both sides of the wall had board on it, I could finally install the pre-hung door. It required a good bit of shimming but in the end it’s pretty balanced and it works so I’m pleased.
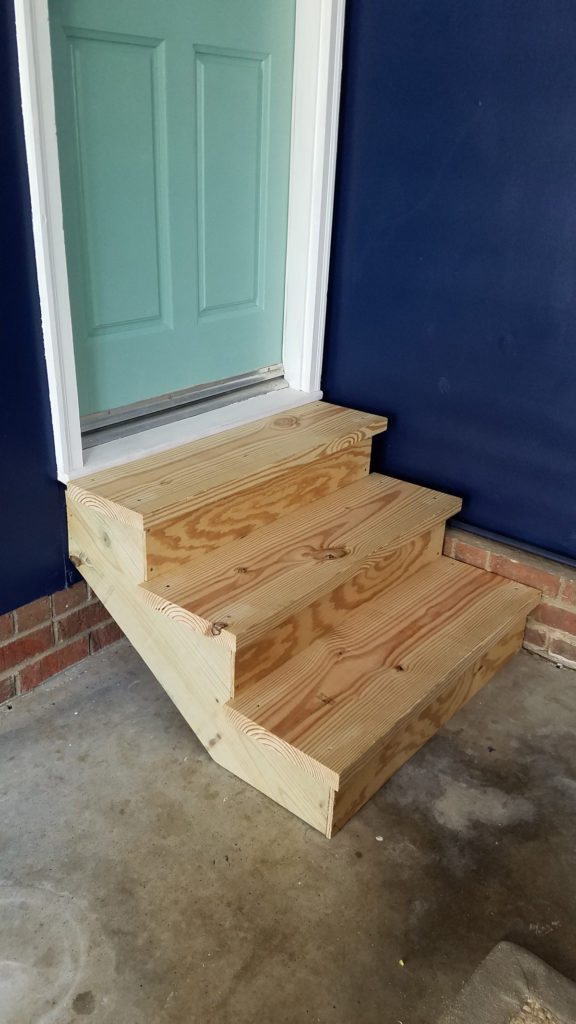
With Elliott coming into our lives any day – we decided it would probably be best to build some legitimate stairs and stop use the stepladder we’ve been using for the last 4 months. Jessi assisted with measurements and recommended the risers and it looks good.
While reflecting on the whole experience, I realized I learned a lot along the way and am thankful to all who helped out. Part 2 was a significant undertaking and Part 3 will be fun to show off cosmetic improvements including paint and trim, as well as actually beginning to organize the shop into somewhere I can work. Check back in another few months 😉